
Create your first restaurant website in just 15 minutes
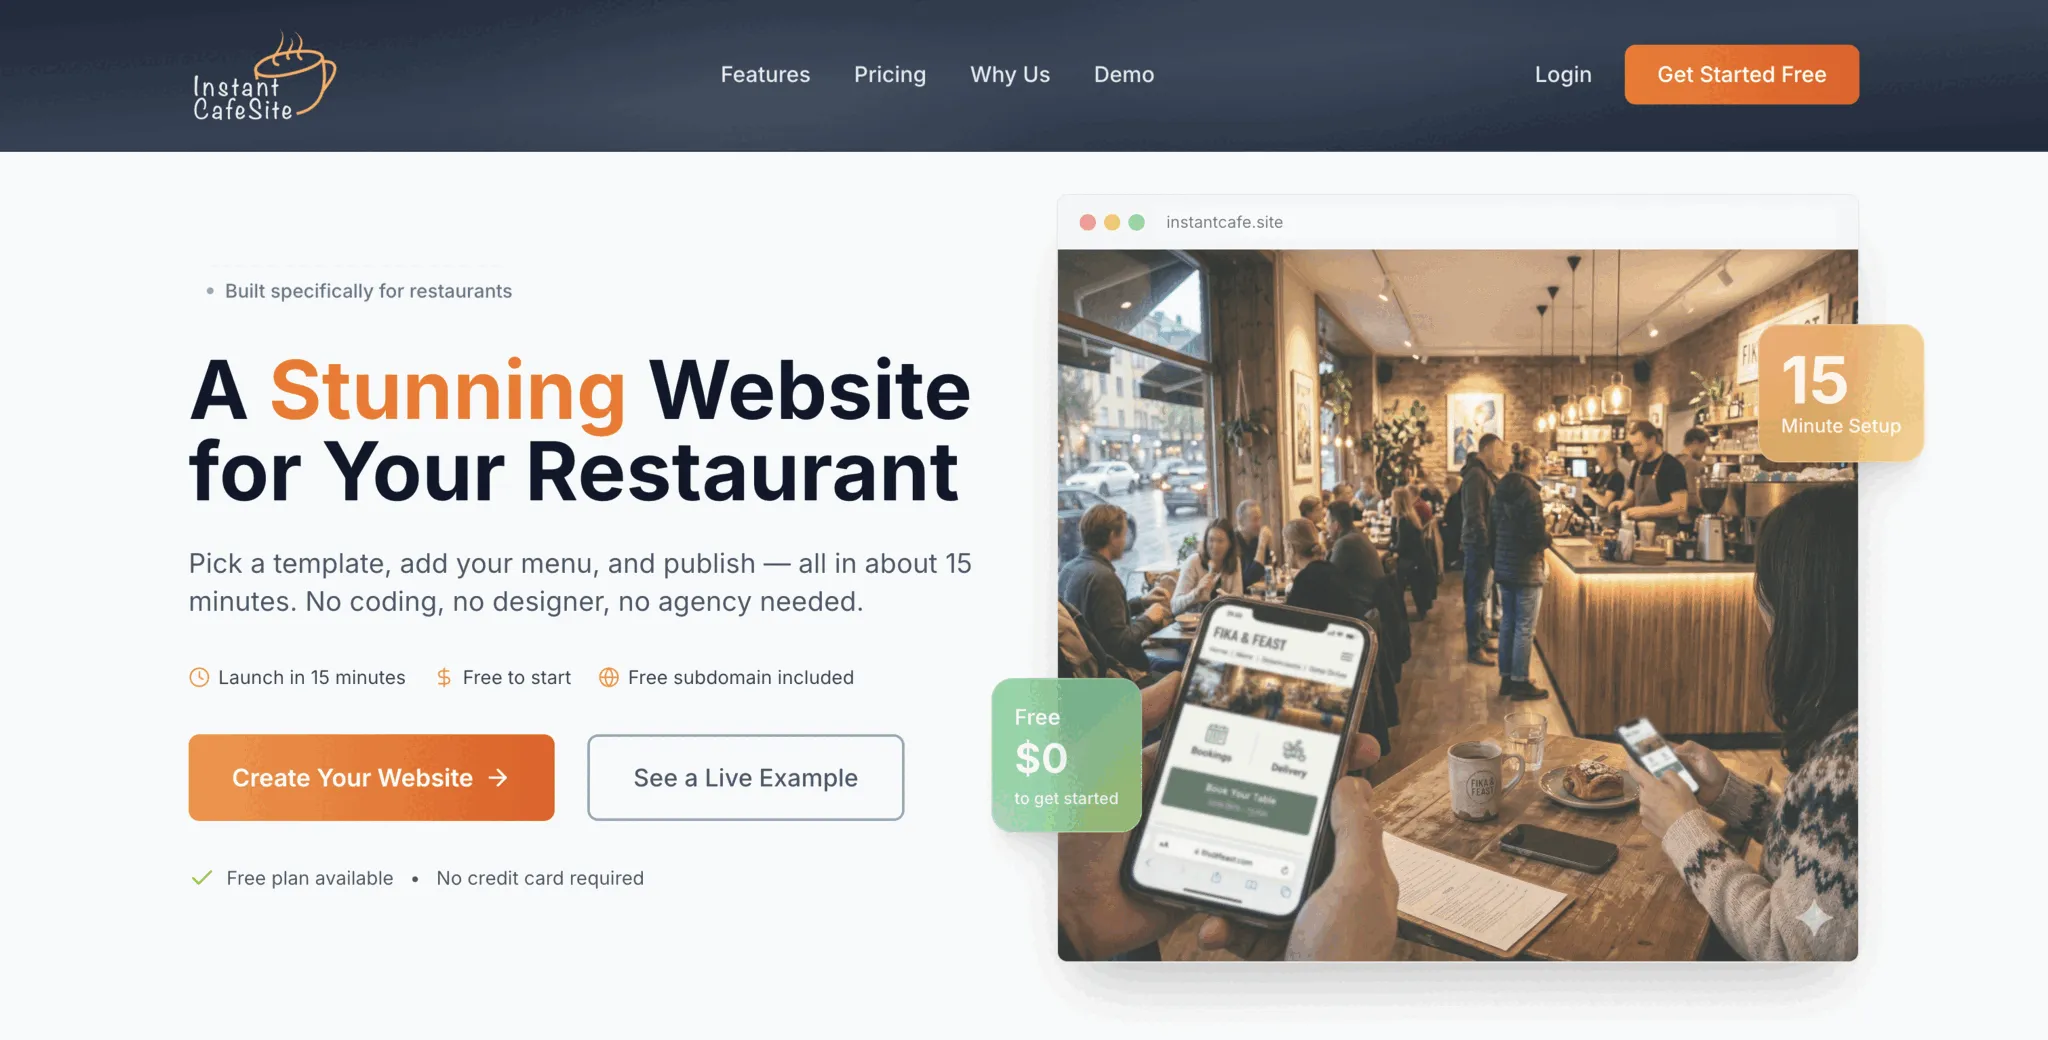
Every day without a website, your restaurant is invisible to customers searching for places to eat nearby. Hiring an agency costs thousands and takes weeks. Generic website builders weren't designed for restaurants — no menu management, wrong templates, too many options.
You don't need any of that. In the next 15 minutes, you'll have a professional restaurant website — live and ready for customers to find you. No coding. No agency fees. Just follow along.
Step 1: Hit the button
To start creating your restaurant website, click the "Create Your Website" button on the homepage.
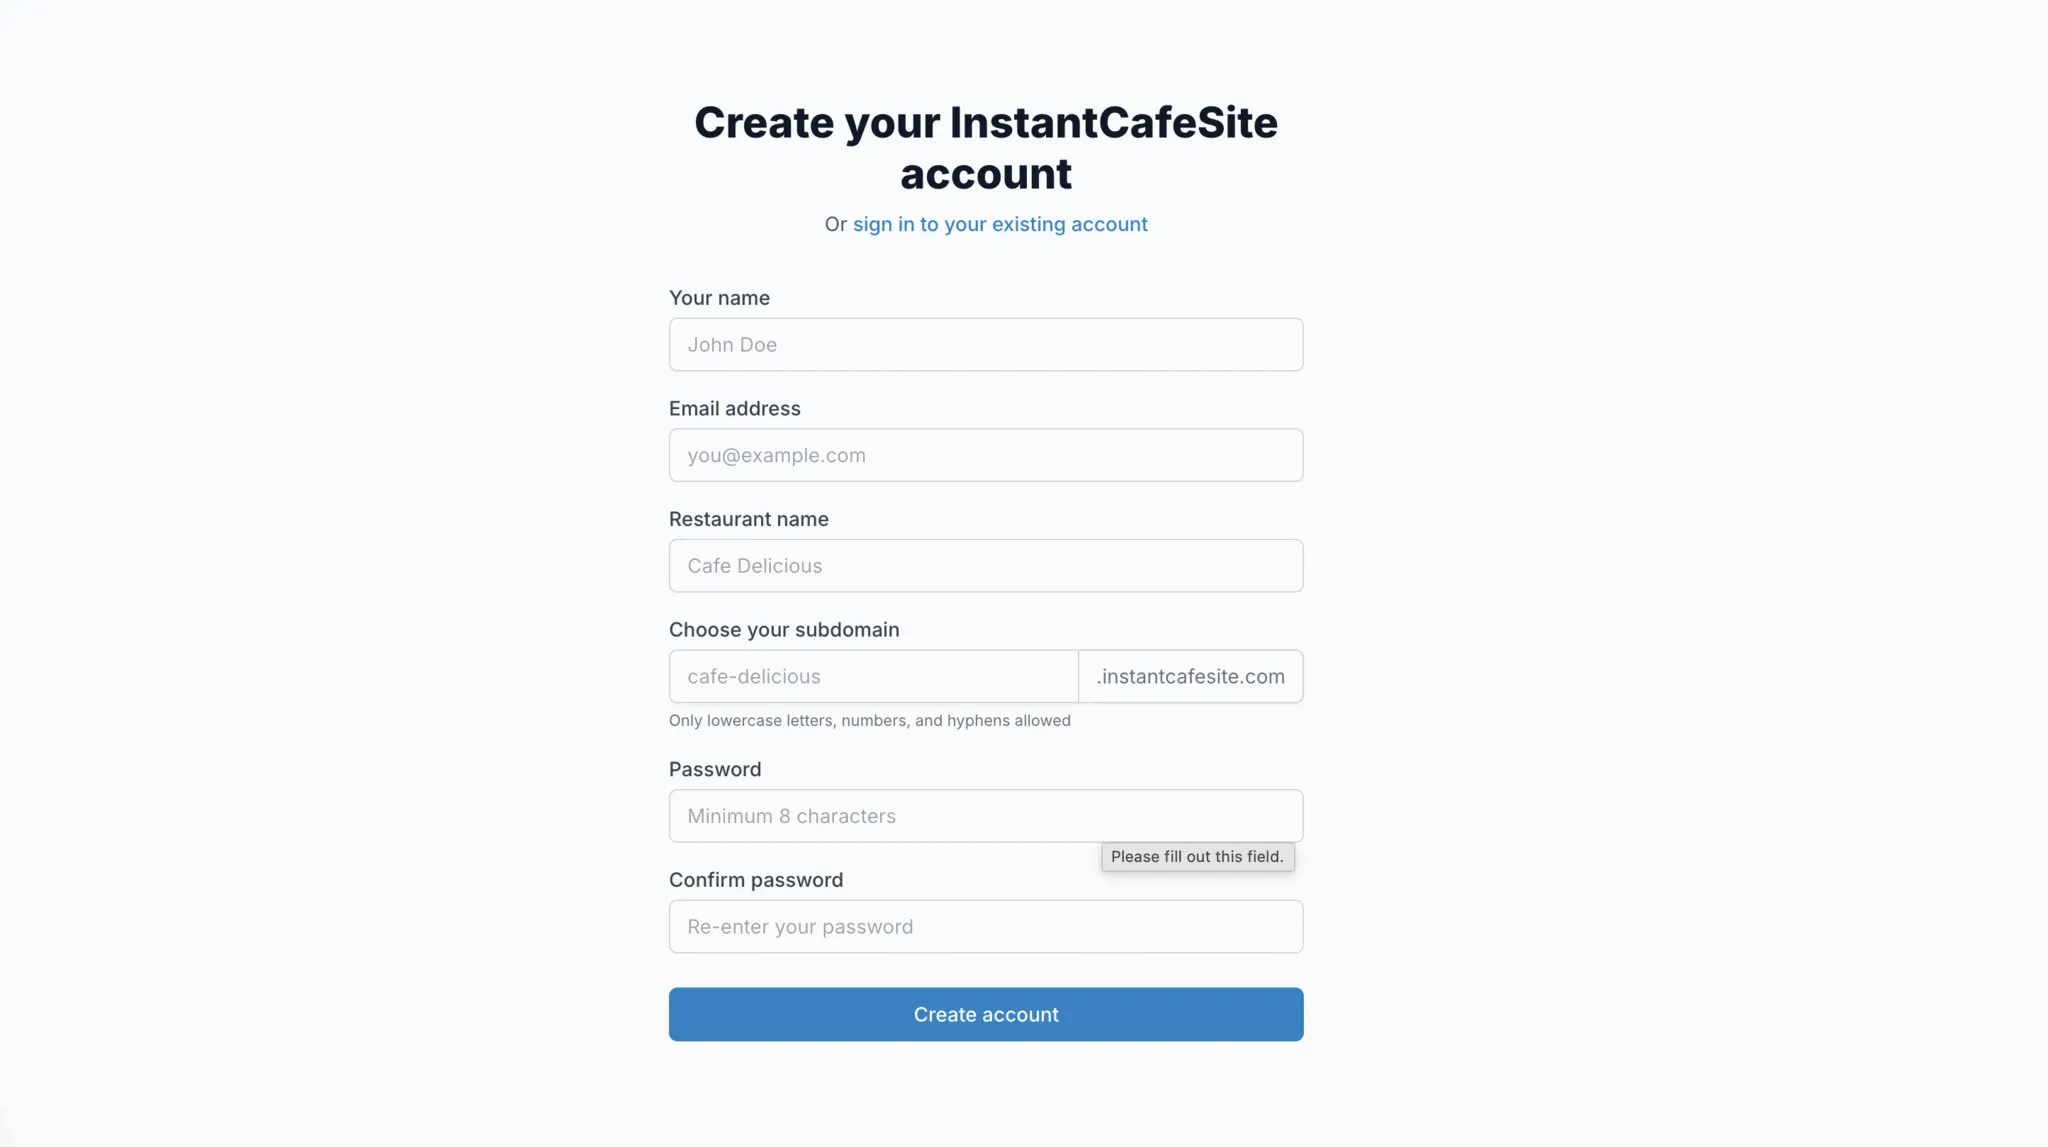
Step 2: Create your account (30 seconds)
Fill in your name, email, and a password, then hit "Create Account." That's it — you're in.
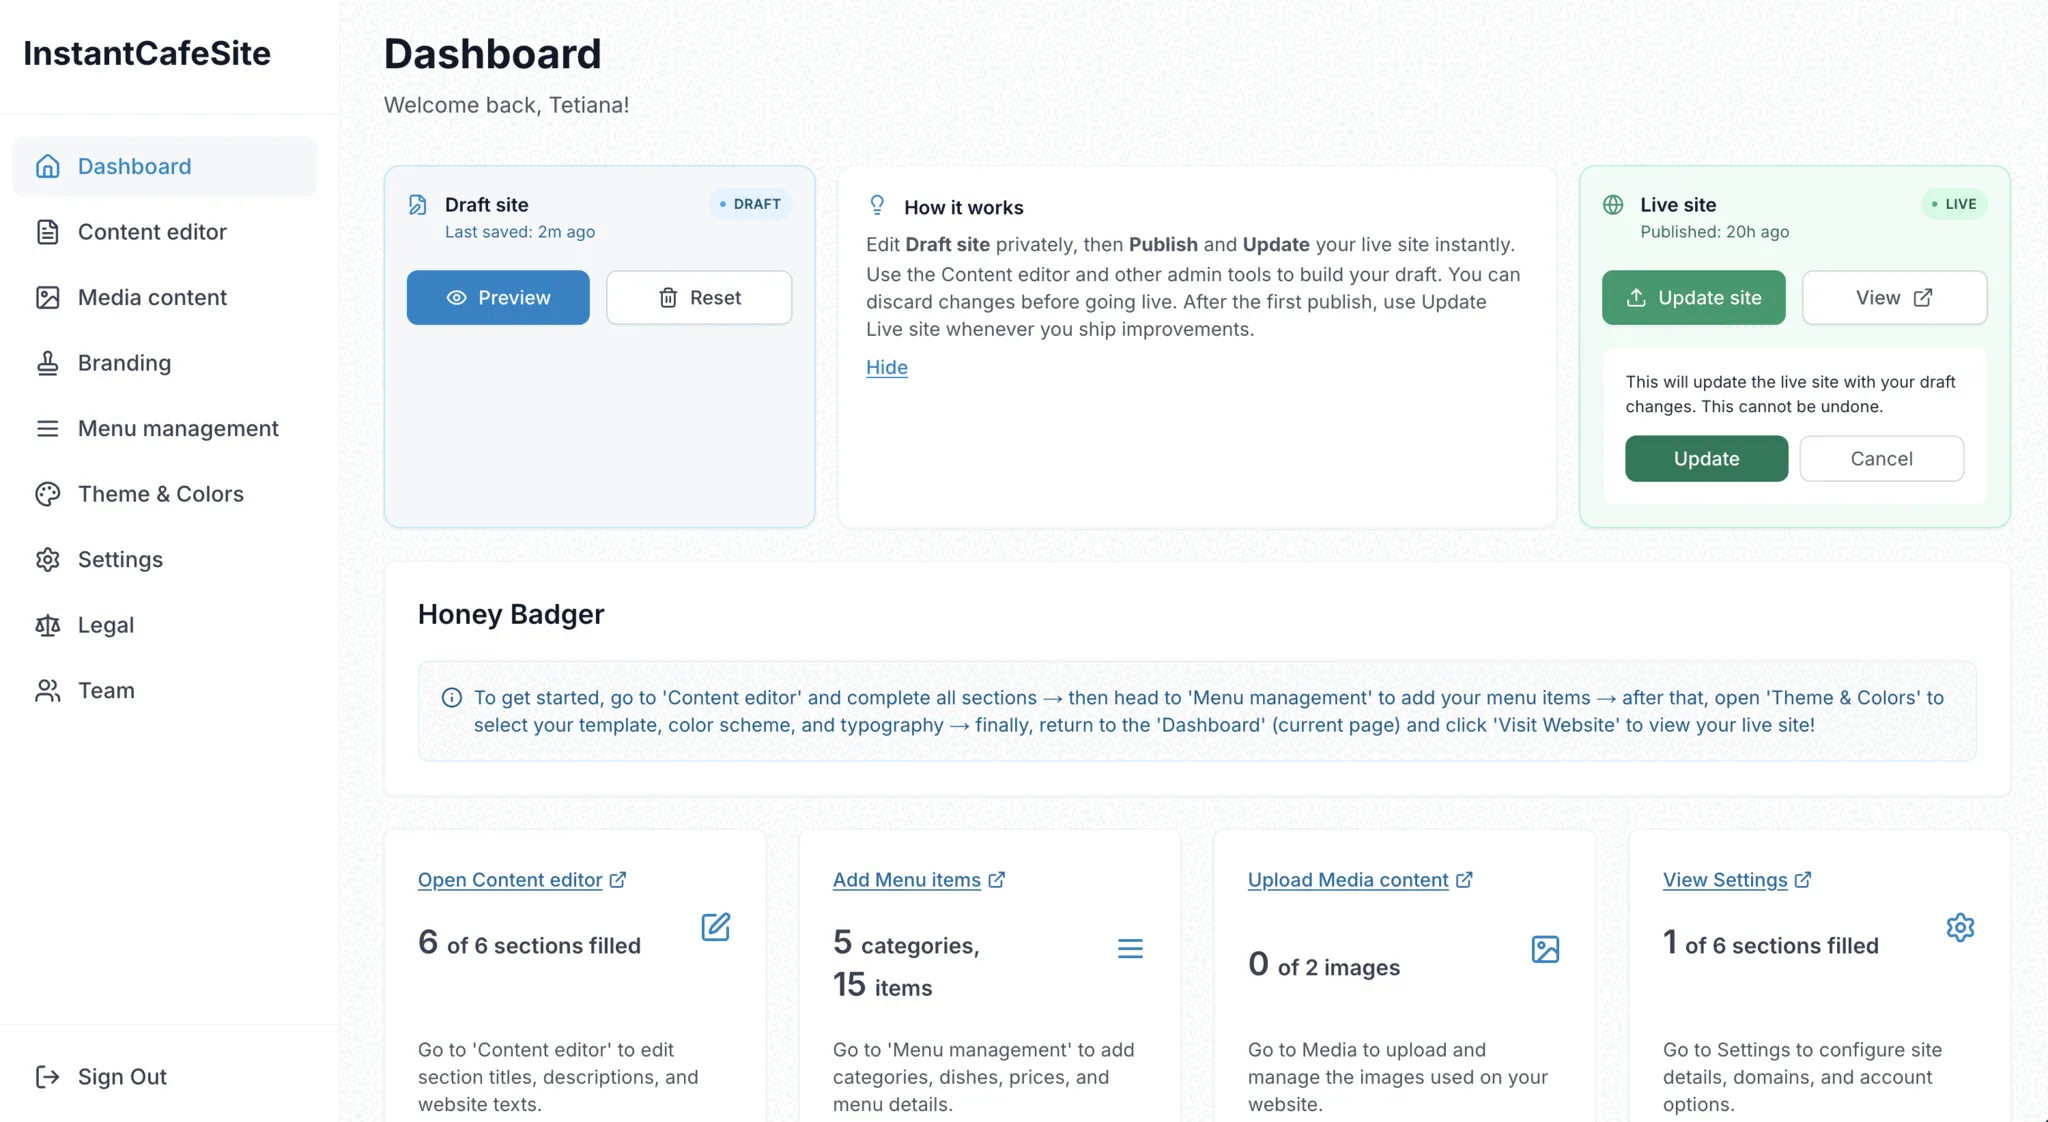
Step 3: Your dashboard is ready
After signing up, you'll land on your admin dashboard. This is where you manage everything — your content, your menu, your design, and when to publish.
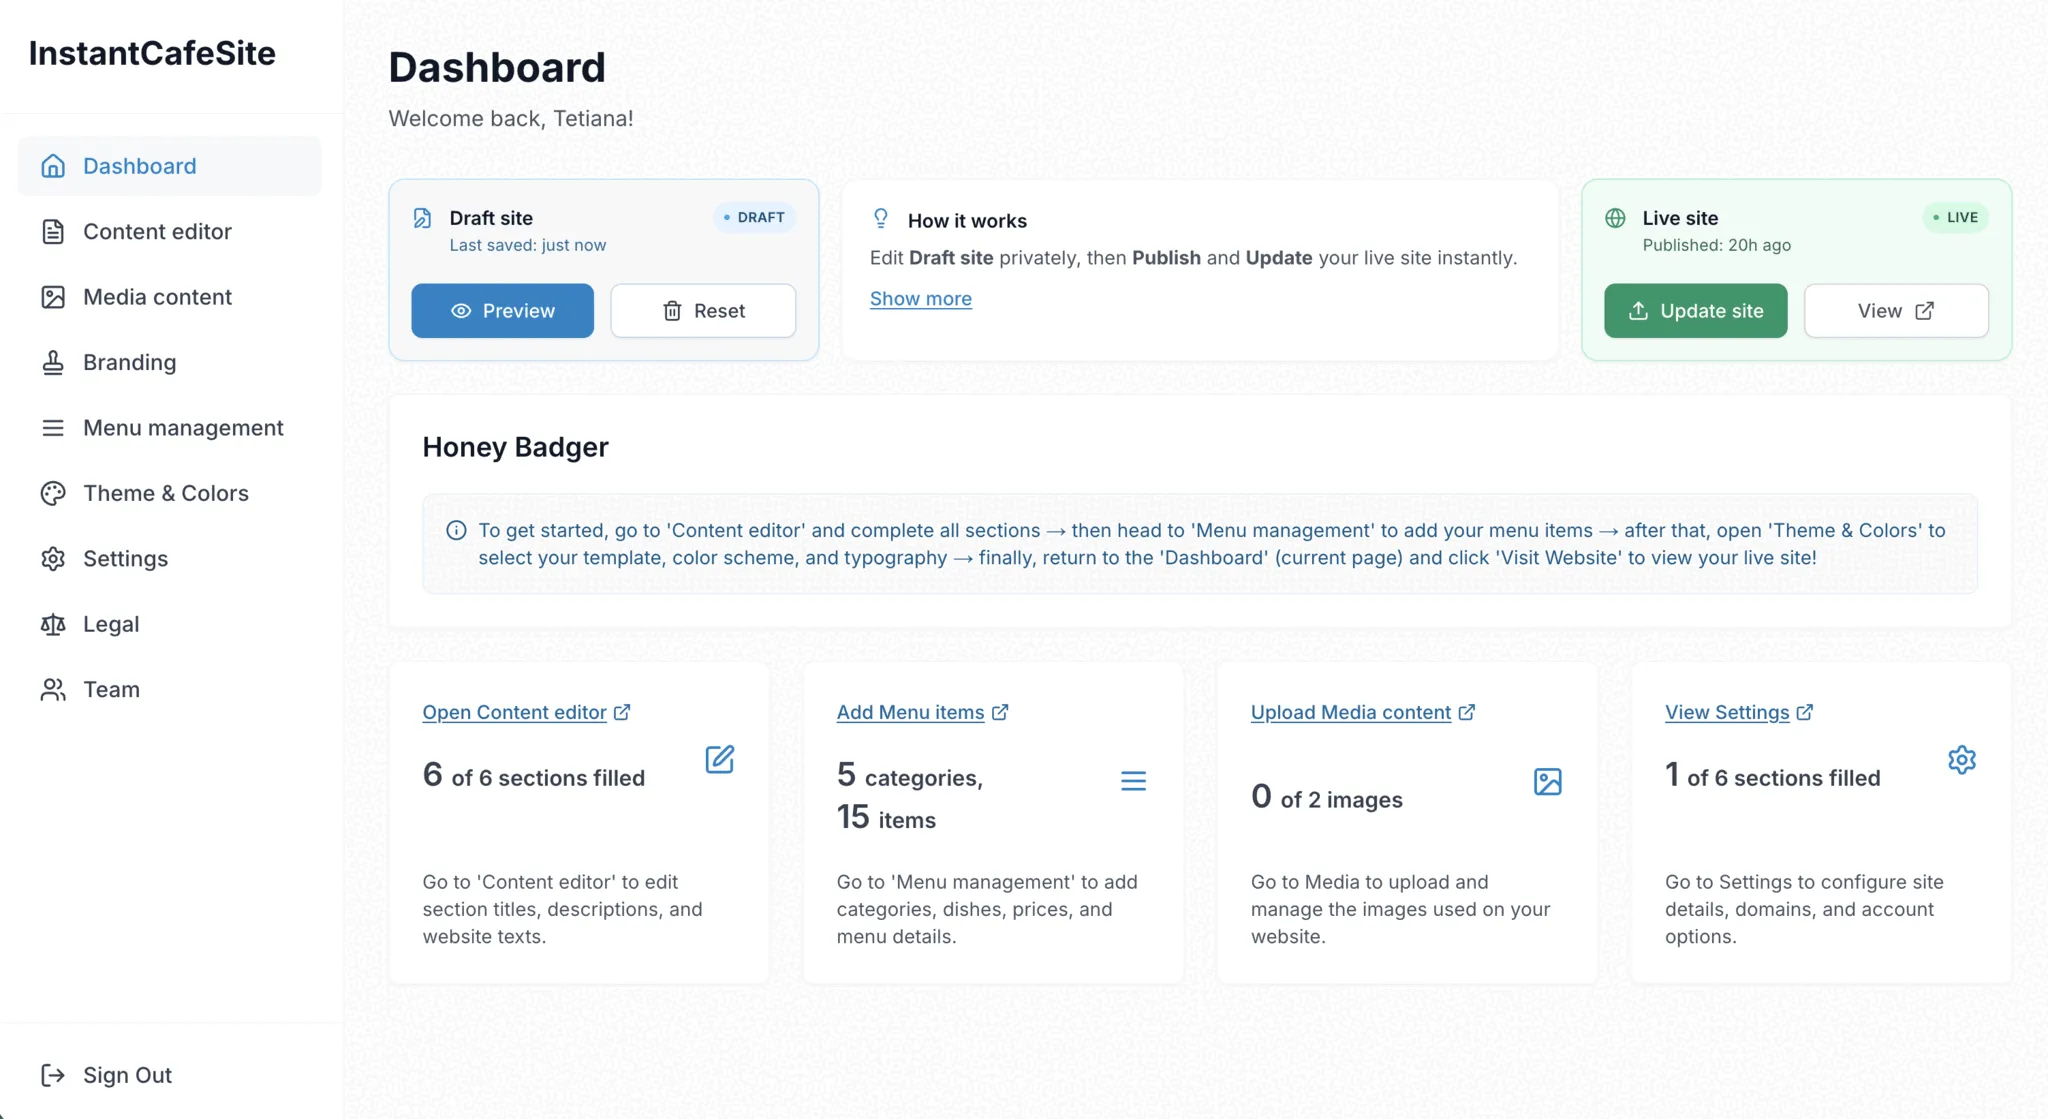
Step 4: Add your restaurant's details
Go to the "Content editor" menu. Fill in your restaurant name, description, address, hours, and contact info. This content powers the main sections of your site, so start here.

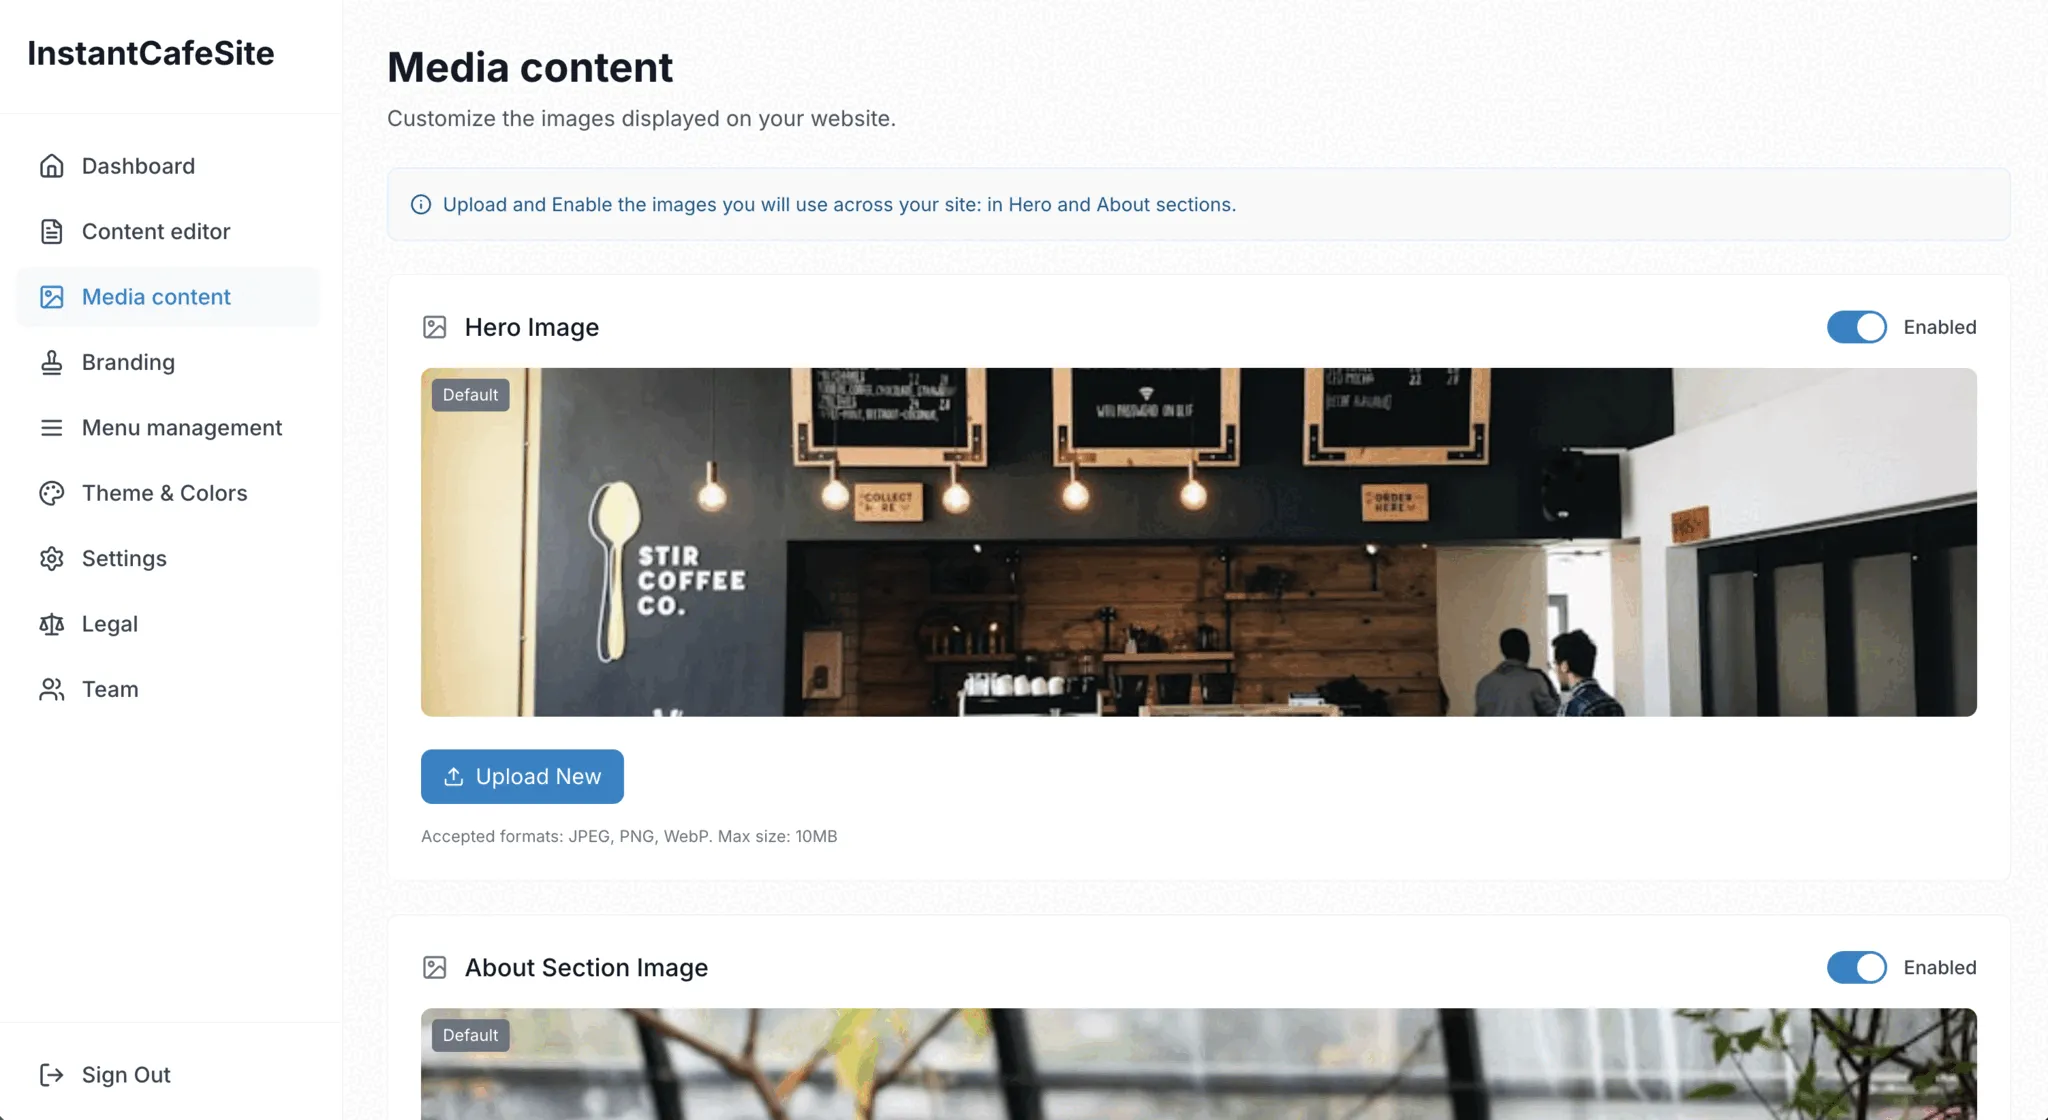
Step 5: Upload your best photos
Head to the "Media content" menu to add photos of your restaurant. These appear in the Hero and About Us sections — the first thing visitors see.
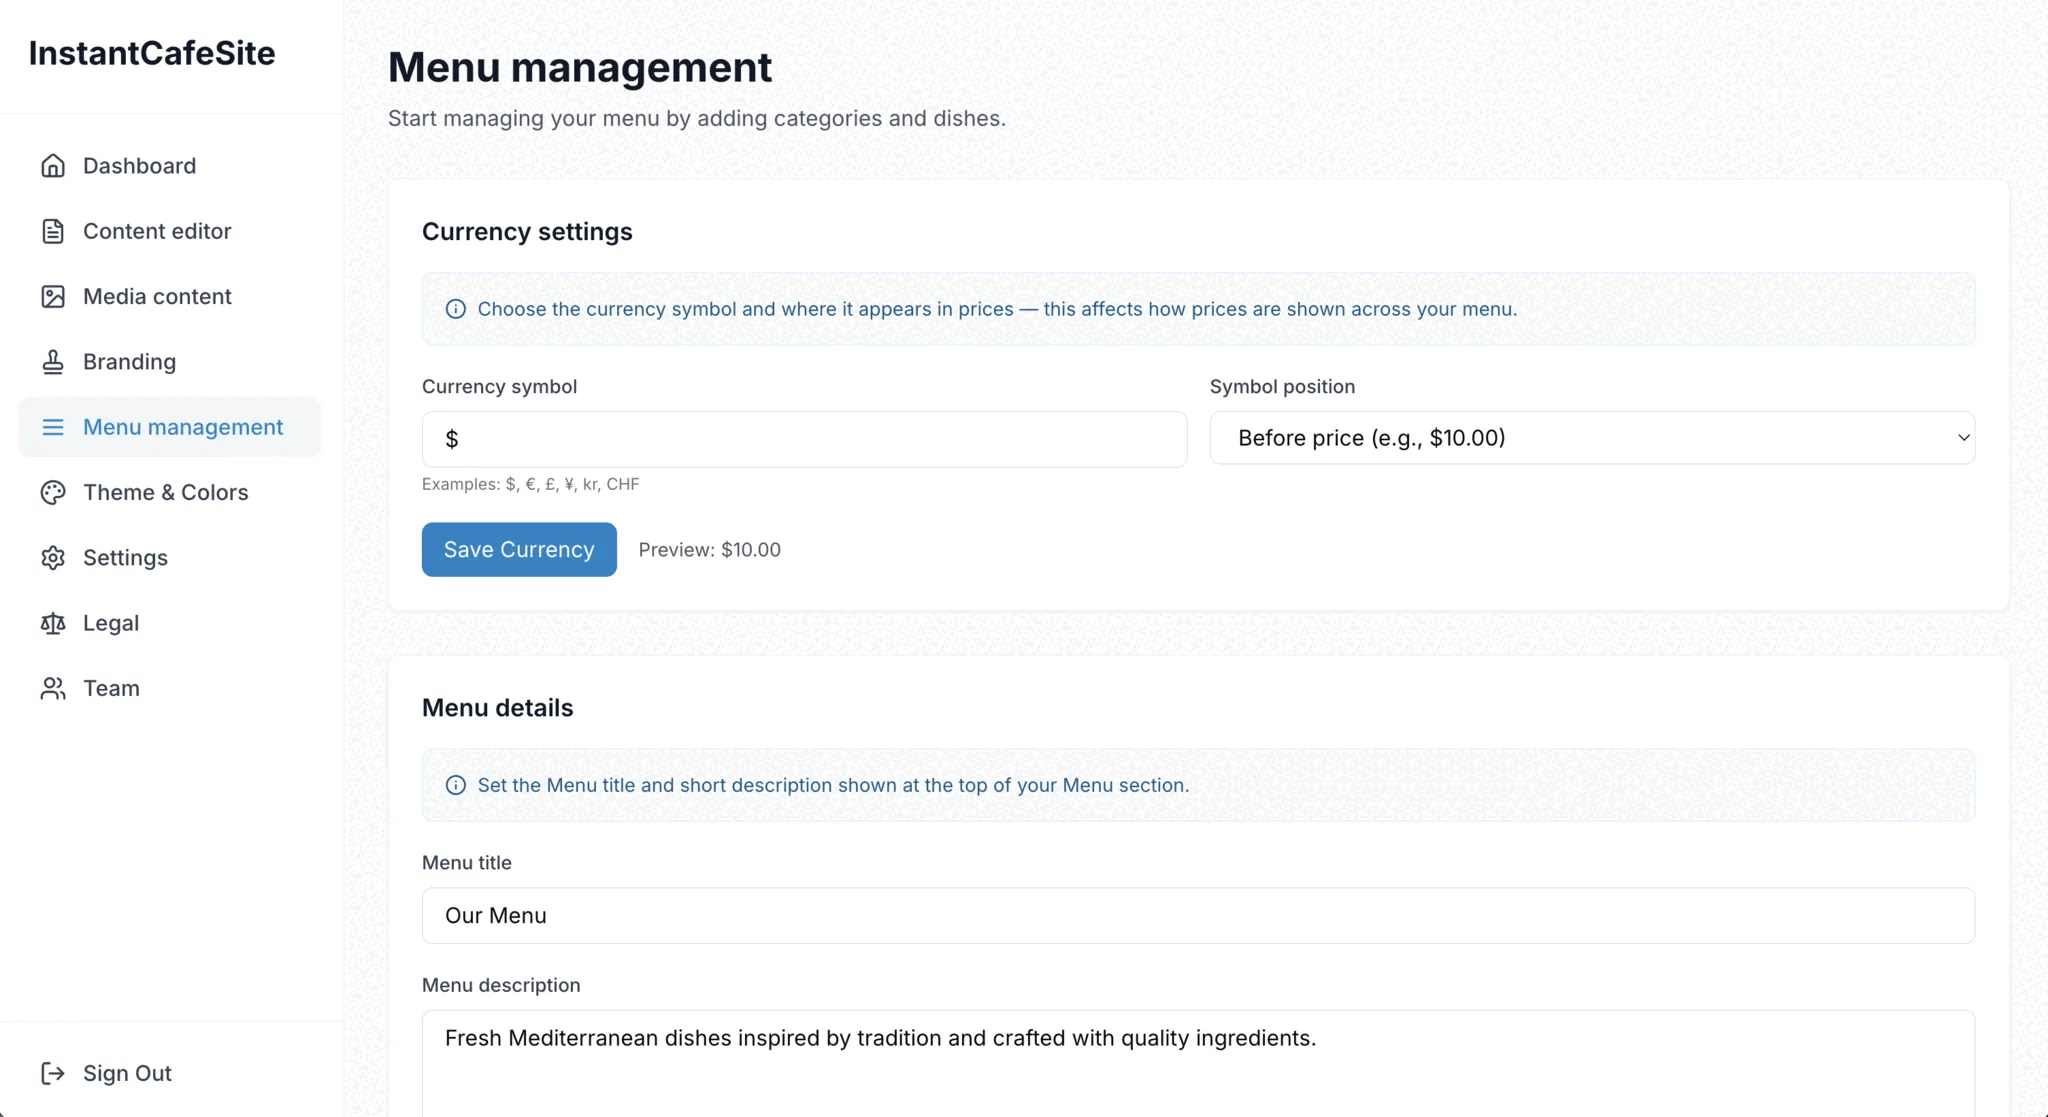
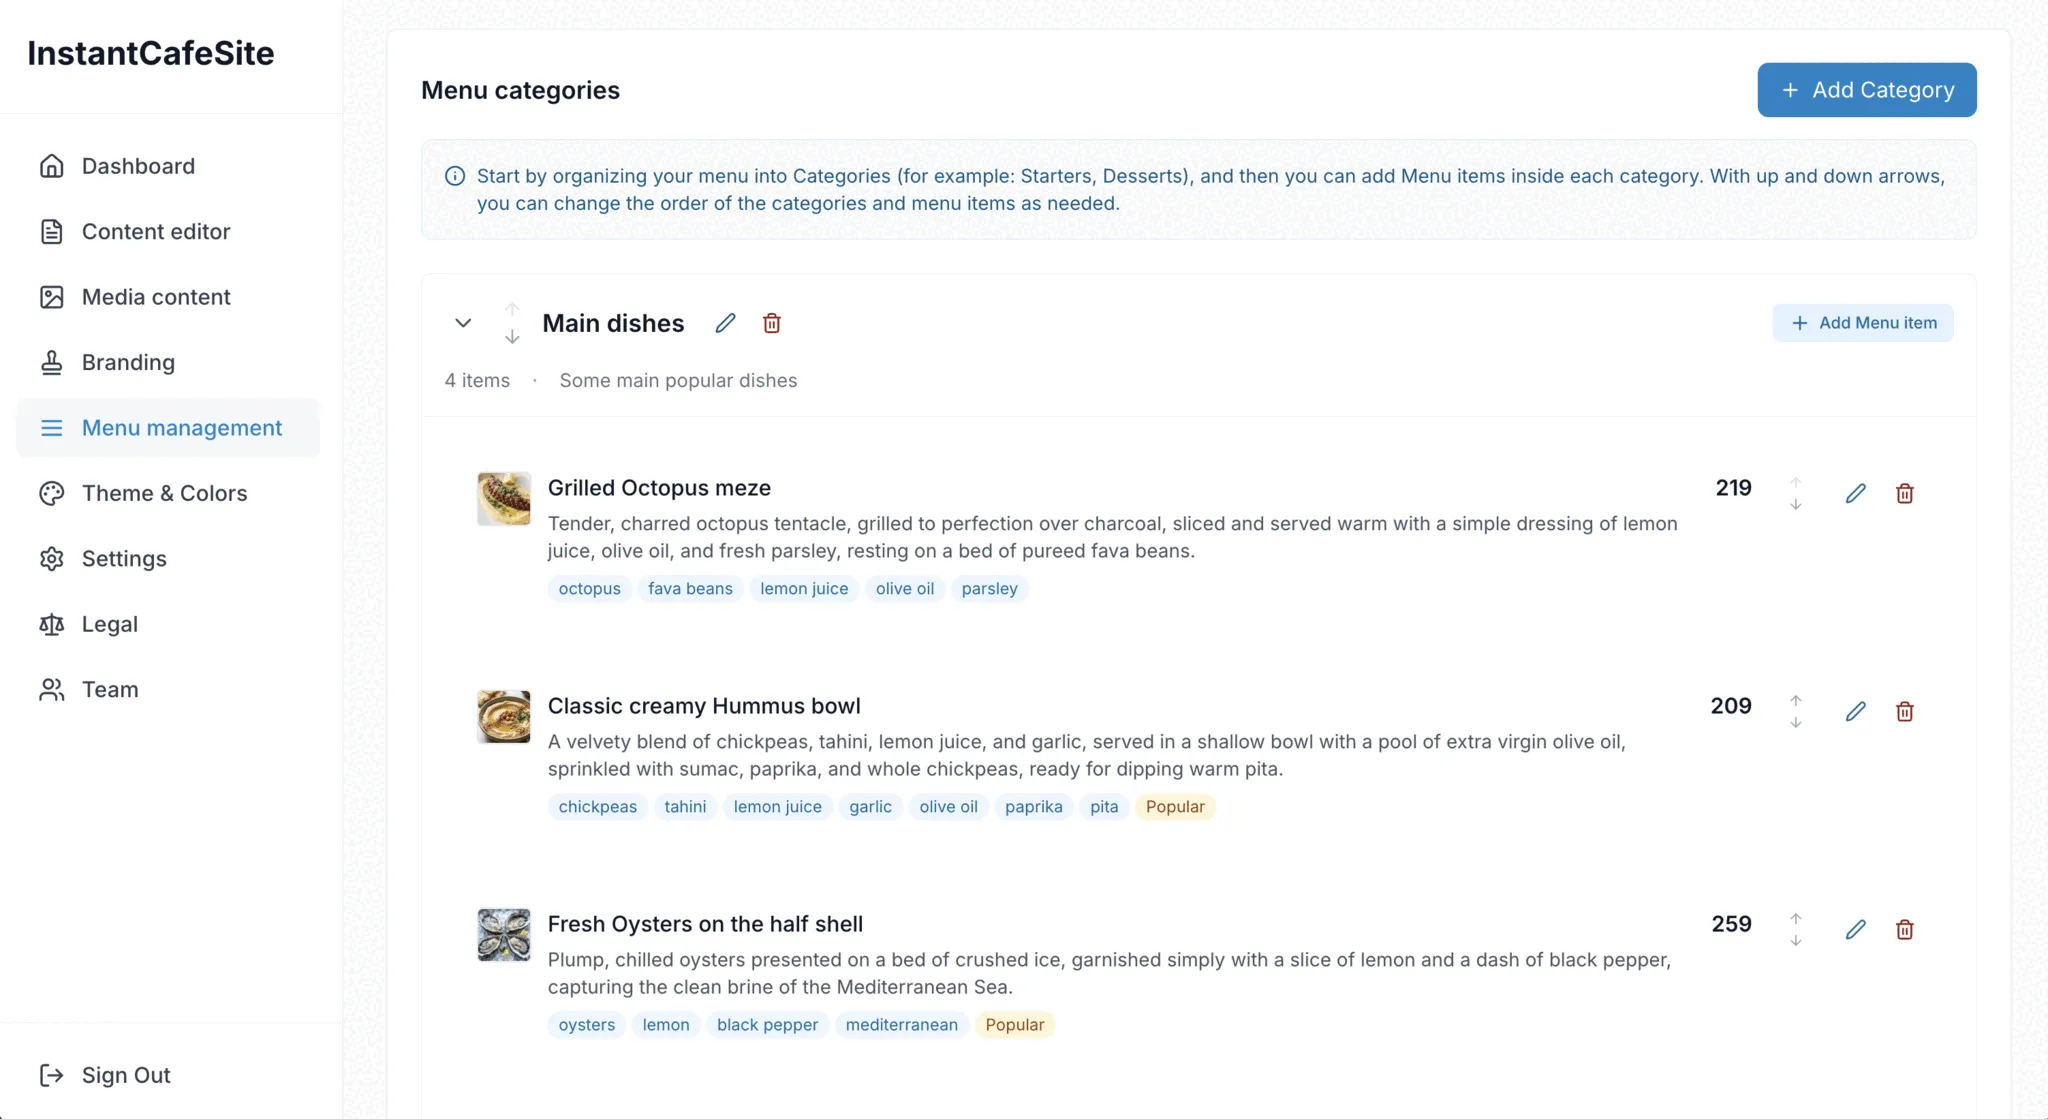
Step 6: Build your menu
Go to "Menu management" and add your categories and dishes. This is the heart of your website — take your time here. Add names, descriptions, prices, and dietary tags so customers know exactly what you serve.
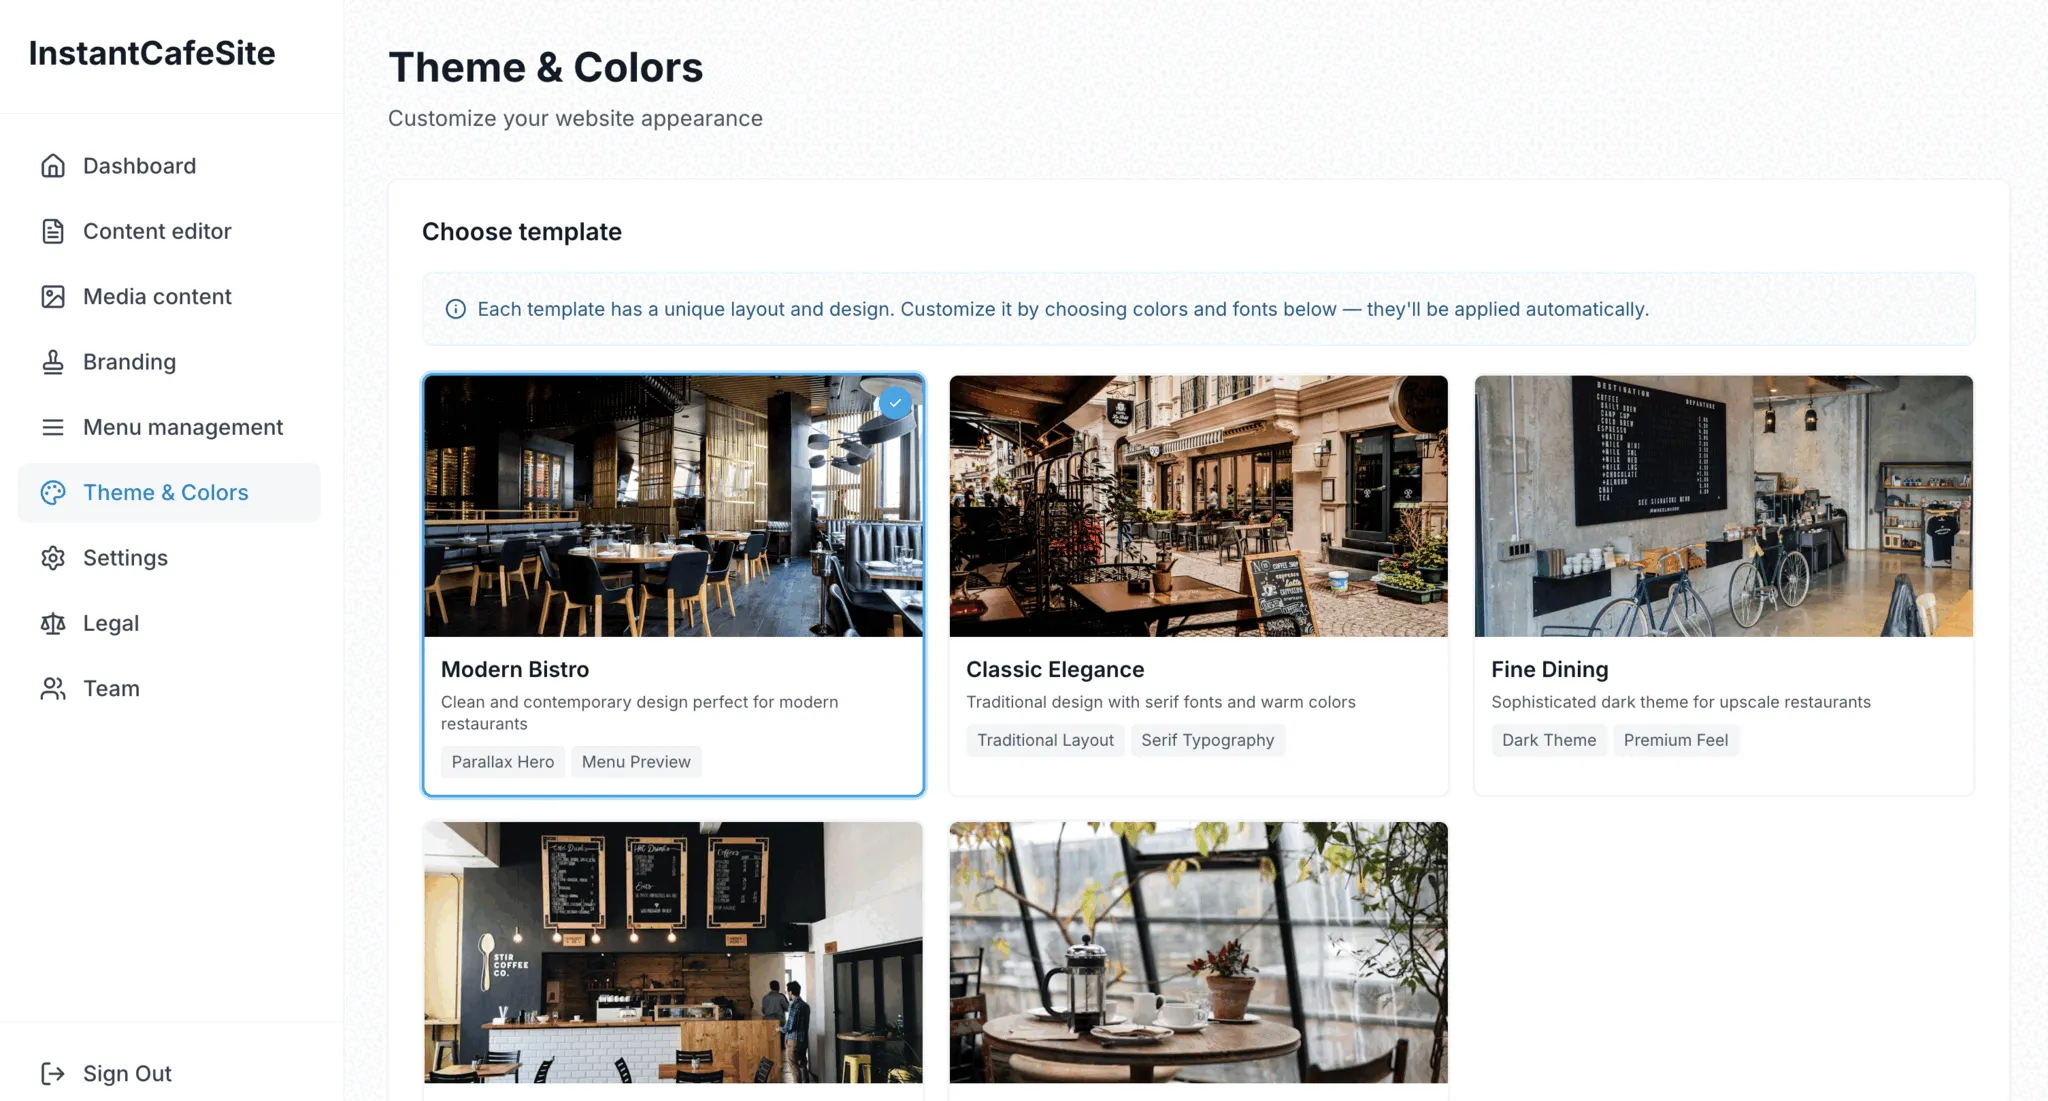
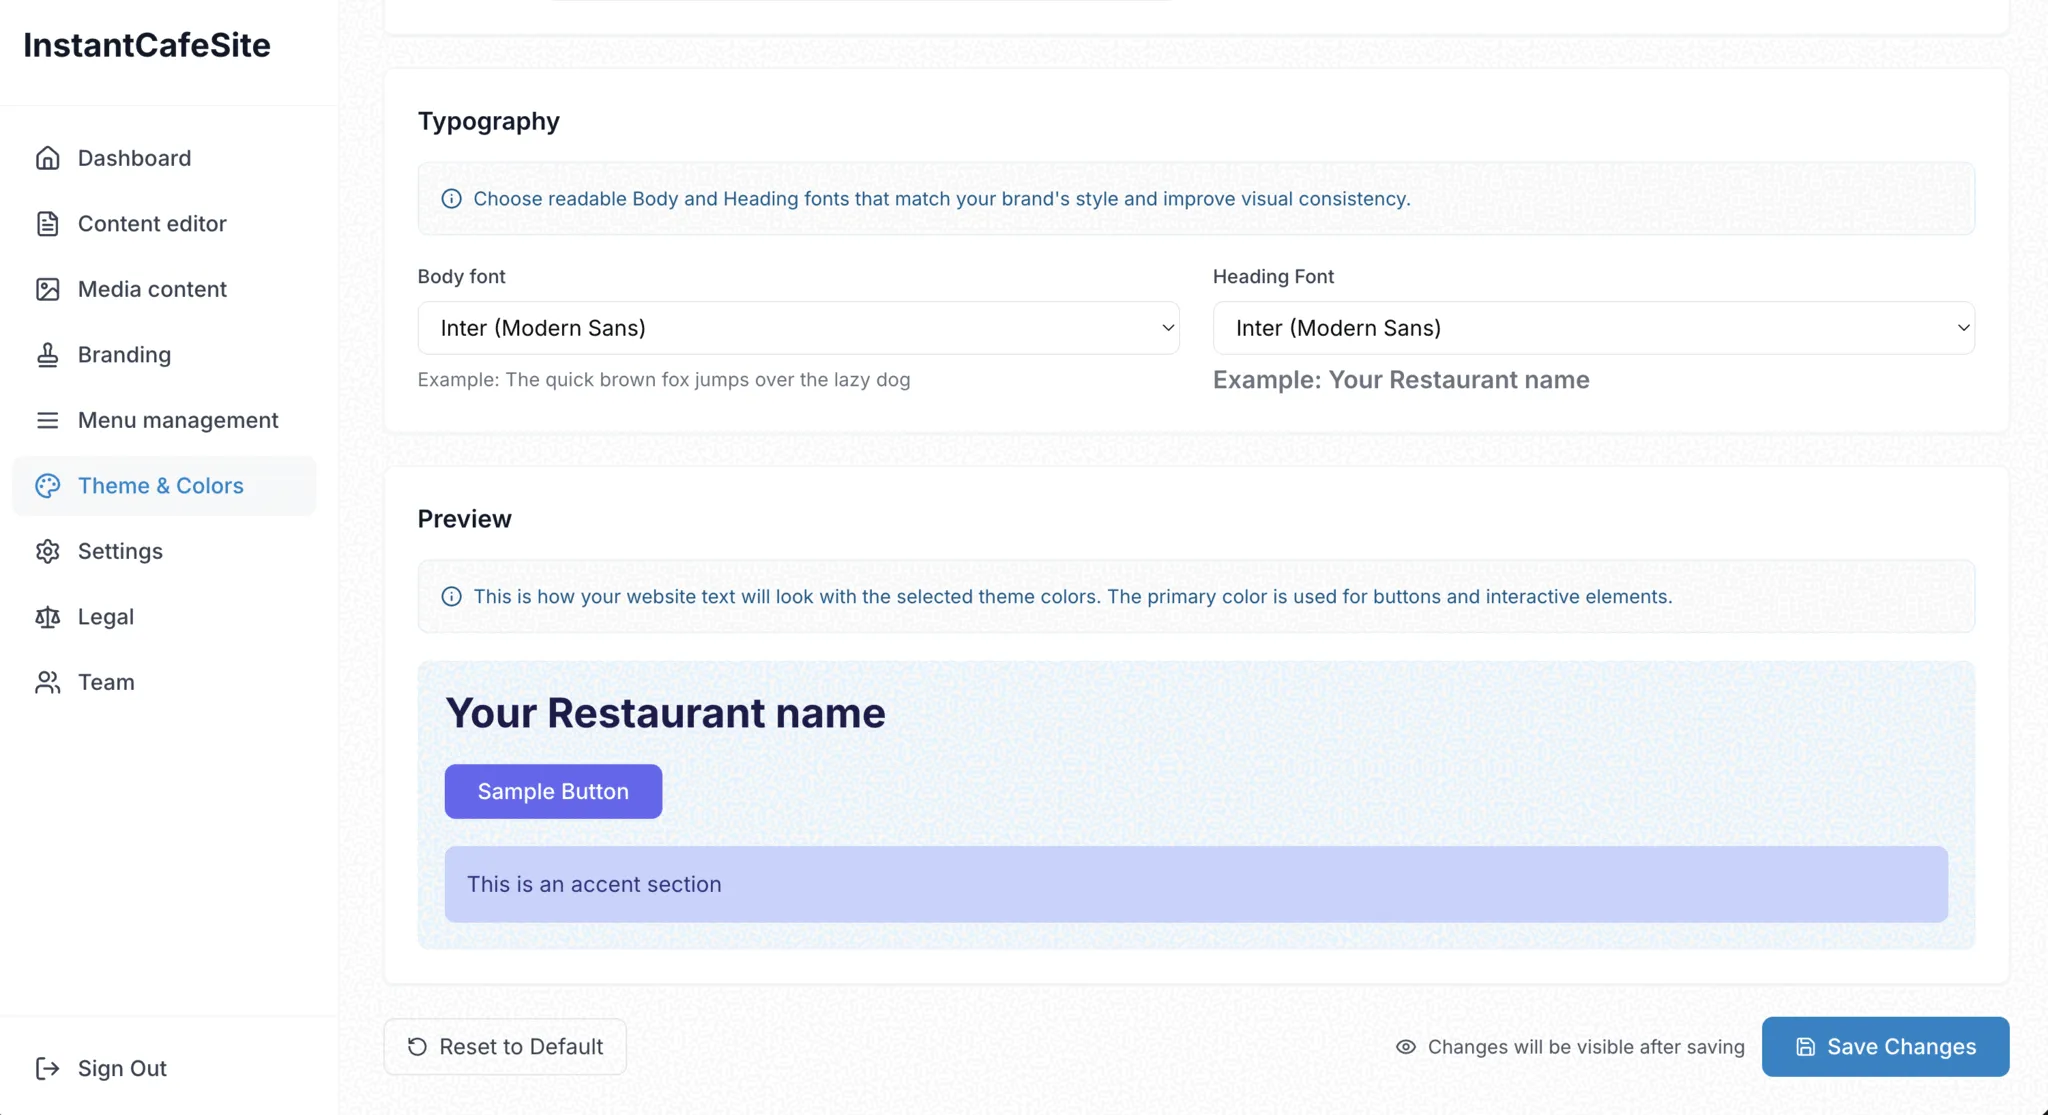
Step 7: Pick your look
Open the "Theme & Colors" menu to choose a template. Then customize the color palette and fonts to match your brand.
Step 8: Save your work
Whenever you make changes, hit the "Save Changes" button. If there's no autosave, unsaved work will be lost — so save often.
Step 9: Preview your site
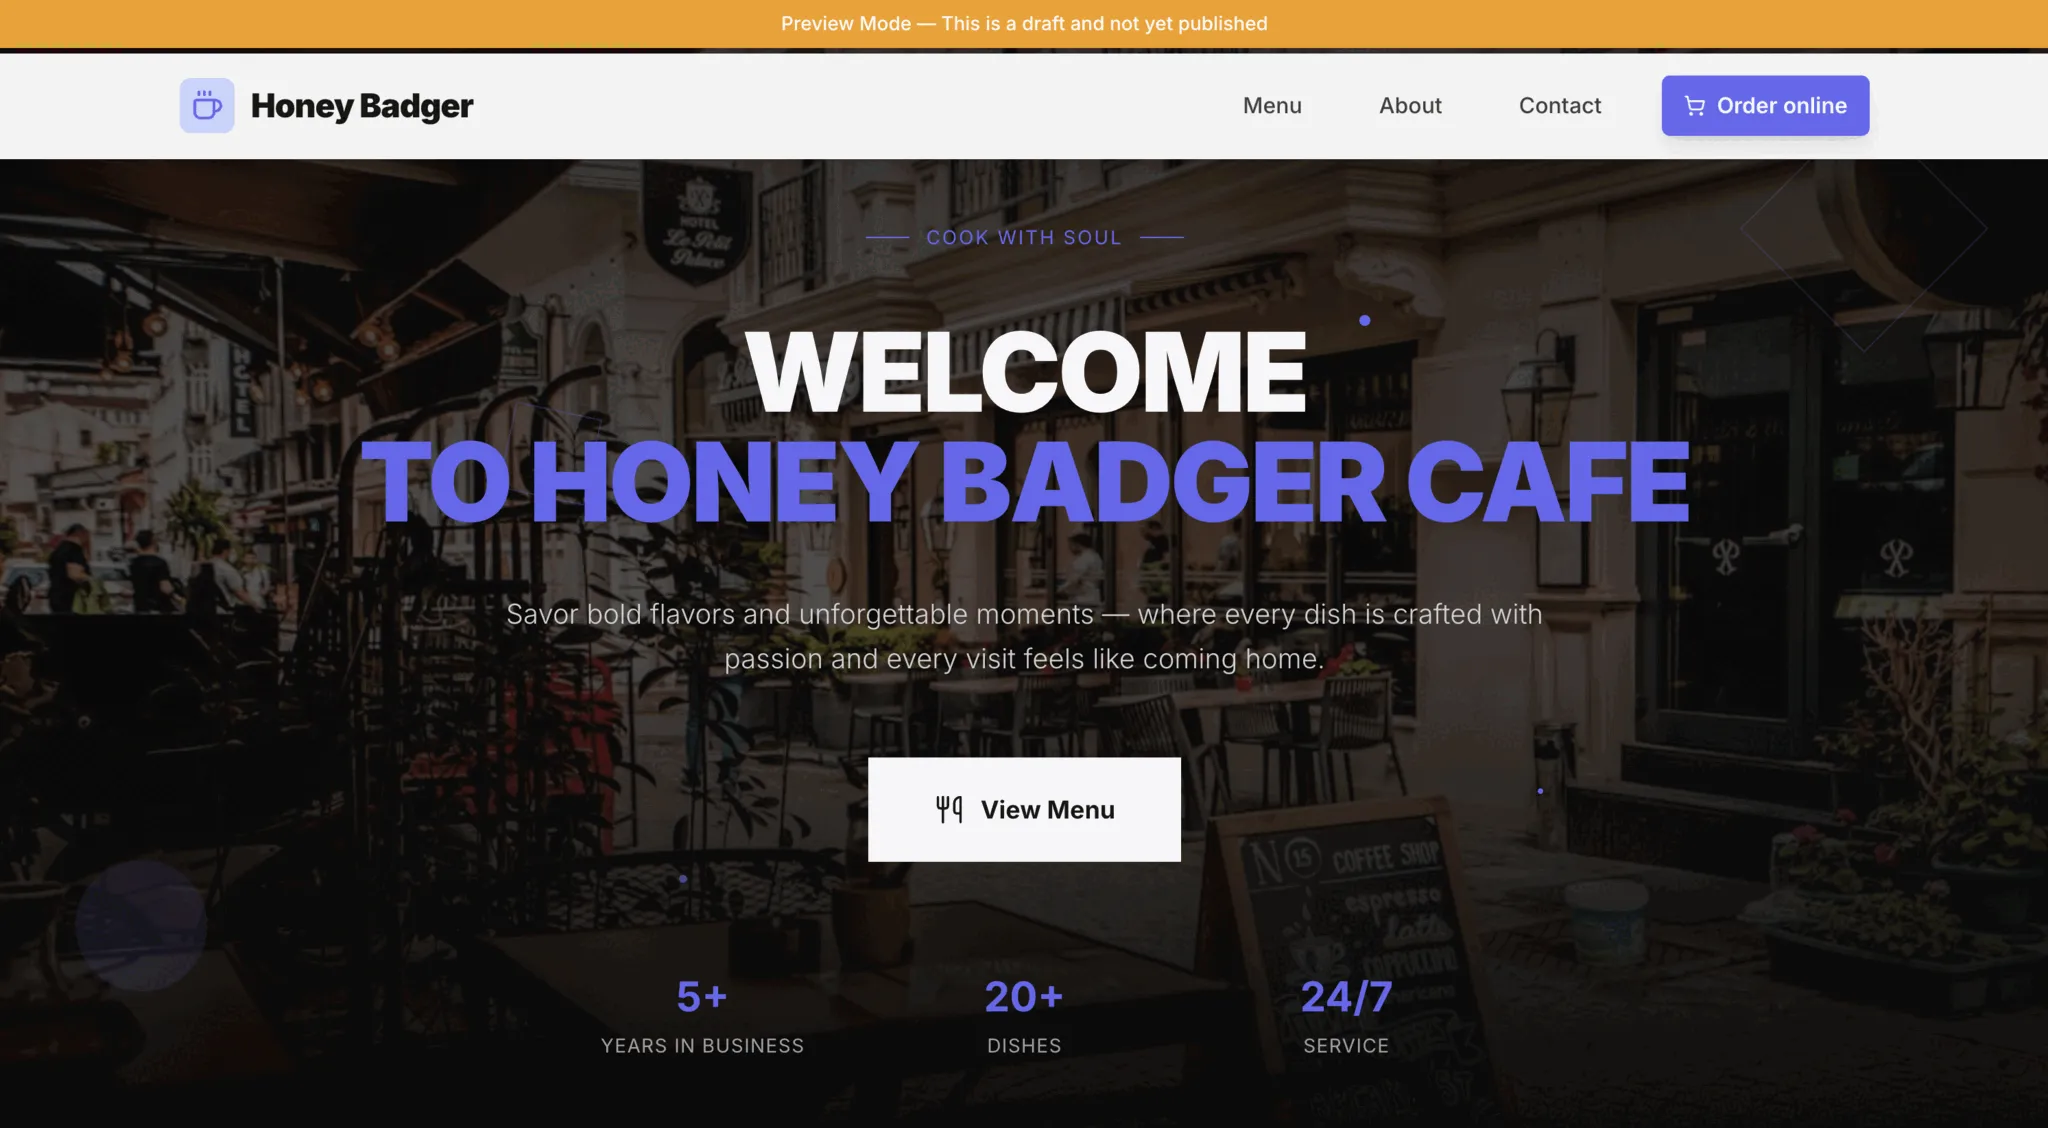
Go back to the "Dashboard" menu and click "Preview" in the light-blue "Draft site" block. A new tab will open with a full preview of your website.
Step 10: Check your draft
Your preview opens in a new tab. The banner at the top confirms this is a draft — your site isn't live yet, so you can review everything without worry.
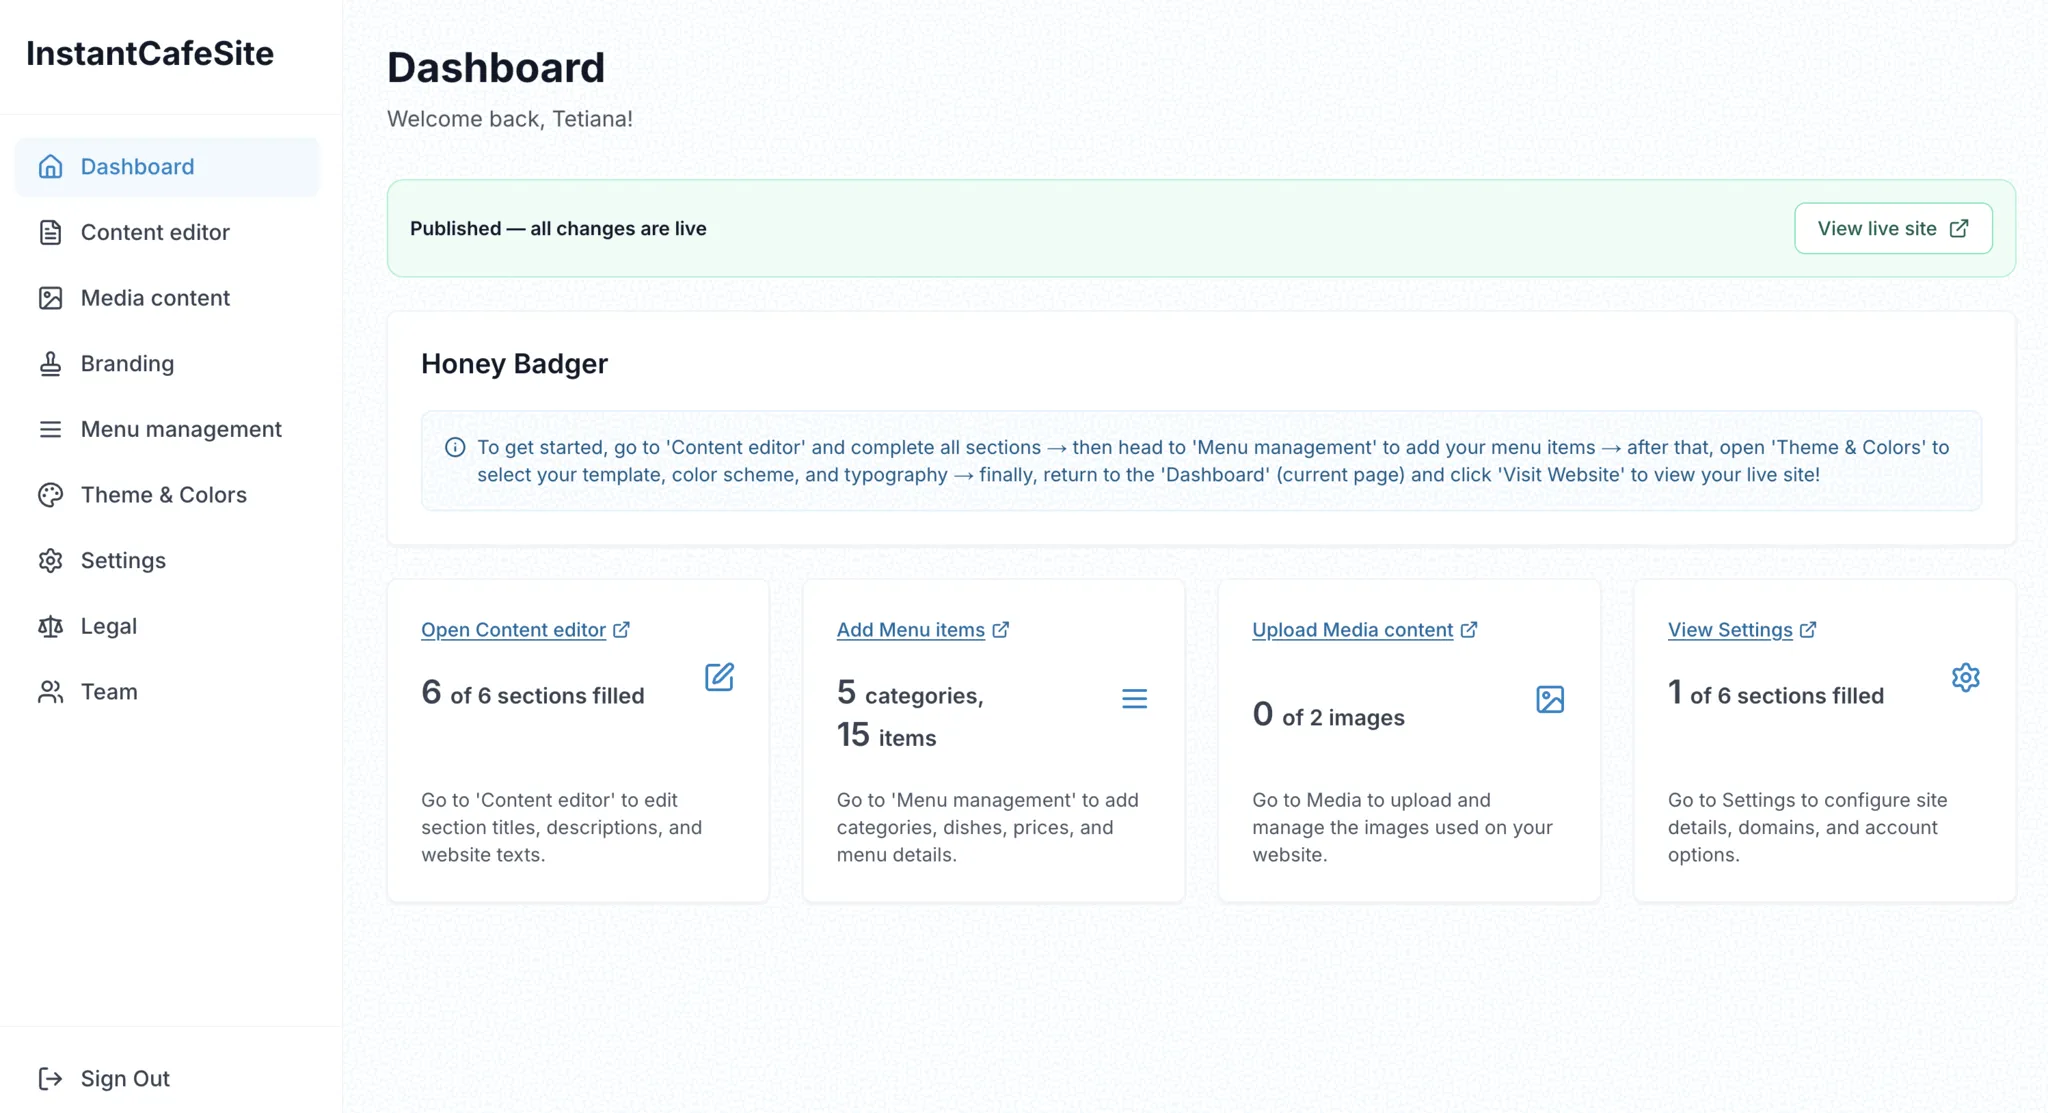
Step 11: Go live
Happy with your draft? Go to "Dashboard," find the light-green "Live site" block, and click "Publish site." That's it — your restaurant is online.
Need to make changes later? Update your draft, then click "Update site" in the same block to push changes live.
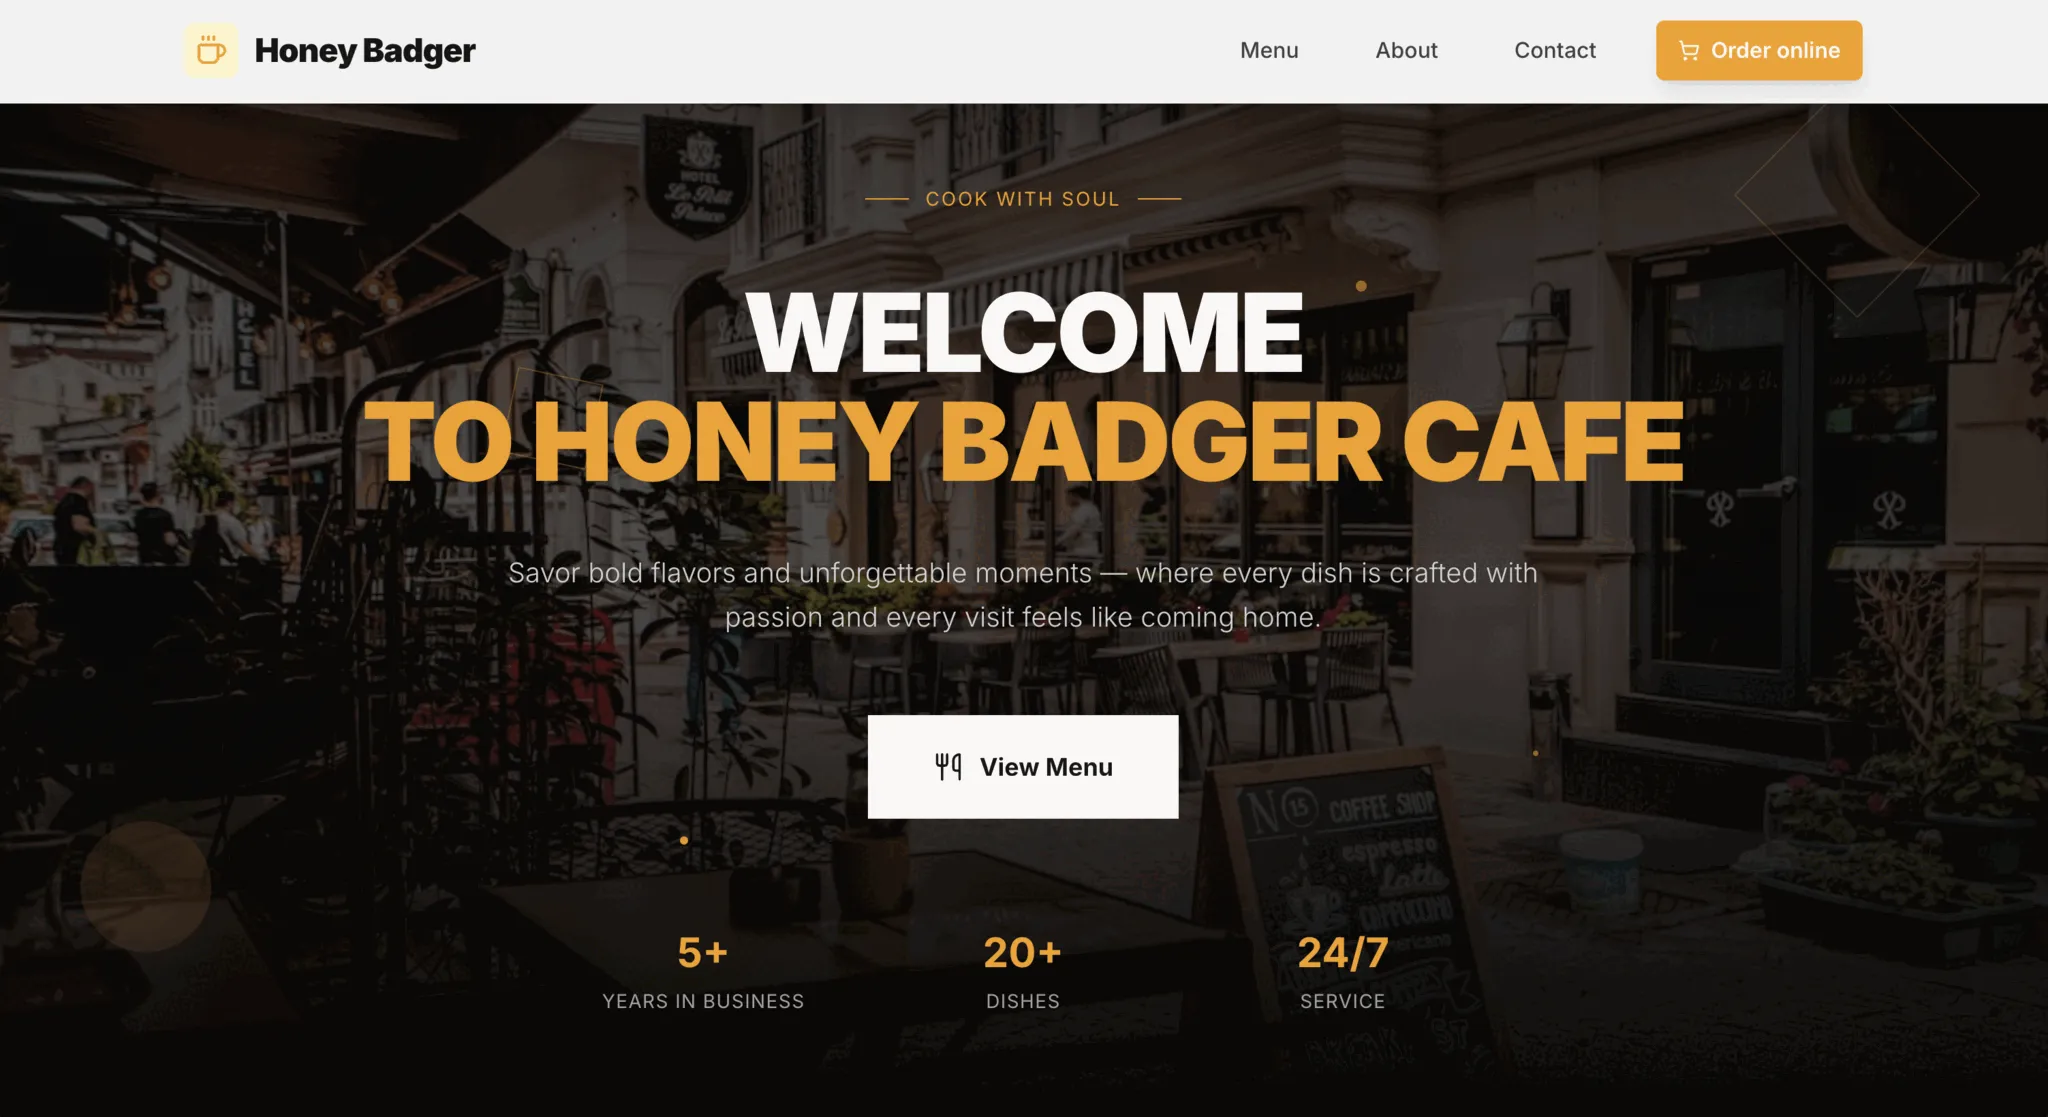
Step 12: Your site is live
Your website is published. Click the link in the "Live site" block to see it — that's the same URL your customers will use to find you.
What you just built
In about 15 minutes, you created a professional restaurant website with your menu, photos, and custom branding — without writing a line of code and without paying an agency.
You can update your site anytime by making changes in the admin panel, previewing your draft, and publishing the update. New seasonal menu? Updated hours? A fresh photo? It takes minutes, not days.
Ready to get your restaurant online? Create your website for free — it takes less time than your morning coffee.